LEGO Robotics microcontroller control - Software
Introduction
In the first post of the series, we started with getting the Arduino Nano to read a LEGO NXT touch sensor. The focus of the post was to get our first sensor readings, and we implemented all the software as simple as possible, straight in the Arduino main setup() and loop() functions. This time, we try to make the software more robust, creating a library that does automatic sensor polling. As we use PlatformIO for the development, we can create a library by adding code to the autogenerated lib subdirectory. We call our library MovingBricks.
Singleton pattern
It is normal for Arduino libraries like the built-in serial library and the “Wire” I2C library to use the Singleton pattern. This is a software design pattern that restricts the instantiation of a class to a single instance.
To implement the pattern and make sure there is only a single object, we do not have any public constructors, only private ones. We also delete copy constructors and assignment operators to make sure no copies of the objects exist. Finally, we have a static class method, getInstance(), that creates or returns the single instance.
MovingBricks.h:
class MovingBricks_
{
    private:
        MovingBricks_() = default;  ///< Private constructor for singleton pattern.
        MovingBricks_(const MovingBricks_&) = delete;  ///< Deleted copy constructor to enforce singleton.
        MovingBricks_& operator=(const MovingBricks_&) = delete;  ///< Deleted assignment operator to enforce singleton.

       // (... other private members and methods ...)

    public:
         // (... Other public members and methods ...)

        /**
         * @brief Gets the singleton instance of the MovingBricks class.
         * @return Reference to the singleton instance.
         */
        static MovingBricks_& getInstance();

};
MovingBricks.cpp:
MovingBricks_ &MovingBricks_::getInstance() {
  static MovingBricks_ instance;
  return instance;
}
To implement the same pattern as other Arduino libraries, we also create a global reference to the singleton instance.
MovingBricks.h:
/// @brief Global reference to the singleton instance of MovingBricks_.
extern MovingBricks_ &MovingBricks;
MovingBricks.cpp:
MovingBricks_ &MovingBricks = MovingBricks_::getInstance();
Having done this, we can implement methods like begin(), and call them from our application code with MovingBricks.begin().
Automatic sensor polling
Next, we tackle automatic sensor polling in the library, using Arduino timer interrupts. This makes it easier to write applications using the library.
Arduino timers and timer interrupts
The AVR ATmega328P microcontroller used in the Arduino Nano has three different hardware timers, Timer0, Timer1, and Timer2. Timer0 and Timer2 are 8-bit, while Timer1 is 16-bit. Each timer can trigger three interrupts, OVF, COMPA, and COMPB. OVF triggers when the timer overflows, the COMPA and COMPB trigger when the timer’s counter value reaches the value in the COMPA or COMPB compare registers.
By default, the timer ticks correspond with the MCU clock frequency, but for each timer the clock frequency can be divided by a clock prescaler. The prescaler can be set to different values between 1:8 and 1:1024. With the largest prescaler, each tick occurs with a frequency of 16 MHz / 1024 = 15.625 kHz, or a period of 64 us. This gives us a maximum timer interrupt period of 16.32 ms for the 8-bit timers (Timer0 and Timer2) and 4.19 s for Timer1, which is 16-bit.
Each timer is also used by standard Arduino libraries in accordance with the table below
| Timer | Used by Arduino functions | Used for PWM output on pin |
|---|---|---|
| Timer0 | delay(), millis(), micros() |
5, 6 |
| Timer1 | servo functions | 9, 10 |
| Timer2 | tone() |
3, 11 |
Selecting the polling frequency and timer
We set the polling frequency to 20 Hz, or a period of 50 ms. The only timer that can be configured with a large enough period directly is Timer1, which is 16-bit. But since we probably use the servo functions for the LEGO motors while we do not have a use for the tone() function, we use Timer2 with a counter in the ISR. We use a clock prescaler of 1:64 and count up to 49 in the ISR before polling the sensors, which gives us a period of ~50.176 ms.
We set up the timer in the begin() function as shown below. For more details on timers and interrupts and how to set it up, this guide on Deepblue Embedded is a great starting point, as well as the ATmega328p datasheet.
void MovingBricks_::begin() {
    // Pin definitions for Mindstorms NXT/EV3 plug.
    pinMode(MS_INPUT_PIN_1, INPUT); // Has external 10k ohm pull-up resistor to 5V
                                    // so don't enable internal pull-up

    // Setup Timer2 for automatic polling of sensors
    cli();                          // Disable interrupts
    TCCR2A = (1 << WGM21);          // CTC mode
    TCCR2B = (1 << CS22);           // Prescaler 64
    OCR2A = 255;                    // Overflow at 256 ticks for ~1.024 ms
    TIMSK2 |= (1 << OCIE2A);        // Enable compare match interrupt
    sei();                          // Enable interrupts

    // All setup done, set initialized flag
    initialized = true;
}
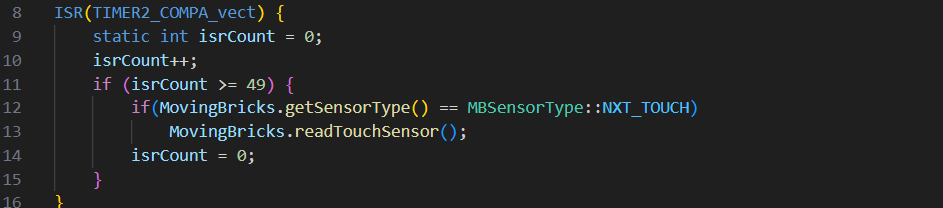
The ISR uses a counter to poll the sensors every 49th time it is called. At the moment, it only polls the touch sensor, as that is the only sensor being implemented yet.
// ISR for Timer2 compare match. Since Timer2 is only 8-bit,
// we use a counter to achieve ~50 ms intervals (49 * ~1.024 ms ≈ 50.176 ms)
// This polling rate, combined with debounceThreshold, determines stability time.
// With the default debounceThreshold of 2, we get ~100 ms debounce time.
ISR(TIMER2_COMPA_vect) {
    static int isrCount = 0;
    isrCount++;
    if (isrCount >= 49) {
        if(MovingBricks.getSensorType() == MBSensorType::NXT_TOUCH)
            MovingBricks.readTouchSensor();
        isrCount = 0;
    }
}
Touch sensor debouncing
We use a simple counter approach for debouncing the touch sensor, where we use a counter to make sure the sensor value is stable for 100 ms (count to 2) before changing the button state.
void MovingBricks_::readTouchSensor() {
    // Only process if initialized and sensor is NXT_TOUCH
    if (!initialized || sensorType != MBSensorType::NXT_TOUCH) {
        return;
    }

    MBTouchState newRawState = readRawTouchState();

    // Debouncing logic, using a simple counter
    // To tune the debounce time, adjust debounceThreshold using setDebounceThreshold()
    // Default is 2, meaning ~100ms stability required (2 * ~50ms)
    if (newRawState != touchState) {
        if (newRawState == rawTouchState) {
            debounceCounter++;
            if (debounceCounter >= debounceThreshold) {
                touchState = newRawState;
                debounceCounter = 0;
                if (touchButtonCallback != nullptr) {
                    touchButtonCallback();
                }
            }
        } else {
            rawTouchState = newRawState;
            debounceCounter = 1;
        }
    } else {
        debounceCounter = 0;
    }
}
We also add functions for tuning the debounce count if needed, but we have not observed any bounce with the default 100 ms.
Additional functionality
The last piece of code is some basic error handling, which we will improve upon later. For now, we just use a counter to set an error state if we get 10 consecutive error readings.
Next post
For the next post in the series, we will implement the rest of the NXT basic sensors.
Source code
The source code for this post can be found at GitHub: https://github.com/vegardw/lego-robotics-control/tree/v0.2
Resources and references
- Singleton pattern - Singleton Pattern on Wikipedia
- Arduino Timers [Ultimate Guide] - Arduino Timers guide/tutorial on Deepblue Embedded
- ATmega328p datasheet